Easy to Hang Vs Saw Tooth Hanger

Sawtooth hangers are one of the many pieces of hardware you can use to hang pictures. It's easy to install; it can hold a lot of weight, and it's stable and unnoticeable from the front. Are you already convinced to use it? First, know how to hang pictures with sawtooth hangers seamlessly. You would need to know the perfect tools to use and, of course, the dos and don'ts of the process.
3 Types of Sawtooth Hangers
A sawtooth hanger can hold up to 9 kg of weight; you might need to use something else with anything heavier. There are three main types of sawtooth hangers used to hang pictures and art. Get to know them to determine which you could use.
Nailless Sawtooth Hangers
The nailless sawtooth hangers do not require nails or screws to install. They are self-attaching hangers specially made for wood frames. It is ideal to use this when you have a lot of pictures to hang.
You only need to hammer down the pointy sides into the wood until it penetrates completely.
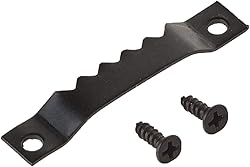
Screw-On Sawtooth Hangers
As the name suggests, you will need screws to install this sawtooth hanger. This sawtooth hanger is more secure than the nailless one. It can also hold more weight and comes in three different sizes.
Snap-In Sawtooth and Notch Hangers for Metal Frames

These specific types of sawtooth hangers are made to hang metal frames. It is relatively easy to install. You would not need to use other tools to attach it to the frame. Another thing is that these are incredibly thin; they allow your art to hang perpendicular to the wall.
Sounds easy enough, right? But there are still a few things to note before getting one and slamming it onto your frame. It is essential to know how to properly hang pictures with sawtooth hangers to get that seamless look.
How to Hang Art with Sawtooth Hangers

The sawtooth hangers work well for both framed pictures and canvas arts. The weight it holds will depend on the type and size of the hanger. Now that you know these different types let's understand how to hang art with sawtooth hangers.
Step 1: Prepare your Workplace
To avoid scratching your art or the front of the frame, place a soft fabric over a clean flat space. The space and fabric should be big enough to cover the front side of your art. This is where you will lay down your art as you install the sawtooth hangers.
Step 2: Measure the Frame
For both pictures and art, you need to measure the width of the frame. Then, mark where you want the hangers to go with a tape or a pencil. If you are using one hanger, make sure it's at the center, or else it would hang unevenly.
If the frame is longer than 2 feet, it's better to use at least two sawtooth hangers to ensure stability and evenness and distribute the art's weight. And they have to be perfectly parallel to each other when installed.
Step 3: Secure the Sawtooth Hangers
Place your hangers on the frame over the marks. The ragged side should be facing down, and the flat should be facing up. With nailless sawtooth hangers, you can hammer it down to the frame firmly but gently.
If you are using screw-ons, then get your screws and screwdriver. Secure the screws on both sides of the hangers through the provided holes. If you're struggling to keep the sawtooth hangers from moving, use tape to keep it in place.
For the snap-in sawtooth and notch hangers, just snap them into the frame channel, and you're done.
Step 4: Hang your Art
Finally, it's time to hang your art. Make your measurements on the wall. Mark where the nails should go. Use a laser if you need to to be sure that it is straight.
Then hammer down your nails, leaving about 2 cm of the head protruding from the wall. Next, gently anchor the hangers to the nails. Lastly, admire your work.
Some Dos and Don'ts
Here are just dos and don'ts you have to remember as you go along the process of installing the sawtooth hangers on your frames.
Dos
- Weight your art or picture and make sure it's not too heavy for your sawtooth hangers
- Use the right type and size of sawtooth hanger for every project
- Secure the hangers evenly on the frame's rail
Don'ts
- Use sawtooth hangers for massive pictures or artwork
- Use a brad nail instead of a head nail
- Use only one sawtooth hanger, even for long pictures or arts
Conclusion
What's great about these hangers is that they are easy to install and visually pleasing because they are unnoticeable once the art is hung. I hope this has been helpful to you now that you know how to hang pictures with sawtooth hangers seamlessly. Undoubtedly, your wall will house beautiful photographs and art in no time.
Source: https://www.homeedmag.com/hang-pictures-with-sawtooth-hangers/
0 Response to "Easy to Hang Vs Saw Tooth Hanger"
Post a Comment